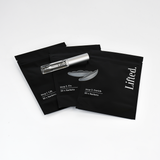


Lifted. Treatment Bundle
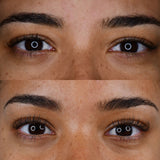
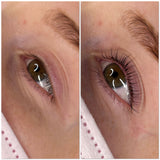
Lash lifts are a MUST for clients who like a natural, but better lash look.
With our Lifted. Treatment Bundle, you can lift up to 3 clients with each sachet. With 10 sachets of each step, that's up to 30 lifts!
This bundle includes:
1x Lifted. Lift 1 (10 sachets)
1x Lifted. Fix 2 (10 sachets)
1x Lifted. Enrich 3 (10 sachets)
1x Lifted. Adhesive Liquid or Balm
1x Lifted. Shields - Small, Medium, Large or Extra Large. Round, Flat or Teardrop.
Full guidelines - Lifted. Guidelines
Read More
Lash Lift Timings
Fine/Thin: 10-11 minutes for step 1 and 6-7 minutes for step 2
Normal: 12-13 minutes for step 1 and 8 minutes for step 2
Coarse/Thick: 14-15 minutes for step 1 and 9-10 minutes for step 2
Brow Lamination Timings
Fine/Thin: 6-8 minutes for step 1 and 4-5 minutes for step 2
Normal: 8-10 minutes for step 1 and 5-7 minutes for step 2
Coarse/Thick: 10-12 minutes for step 1 and 6-8 for step 2
Here’s how the Lifted. 3 Step System process works:
Step 1: Lift
When the lifting lotion is applied the cuticle scales swell and open, allowing the lotion to penetrate the cortex of the hair. The Disulphide bonds then break down and soften. Hydrogen from the Lift lotion continues to break down the Disulphide bonds so that it can stretch and mould into its new shape.
Step 2: Fix
When the fixing lotion is applied, a process called oxidation takes place. This reforms the broken bonds which makes the hair harden, fixing it into its new position. The new shape is formed in the Keratin. The Disulphide bonds continue to lock into place and cure for up to 48 hours post-treatment. It is important that products are not applied as this may interrupt the process.
Step 3: Enrich
This is the perfect finishing touch to ensure that the clients' lashes stay healthy and strong. Enrich works by sealing the lash with Keratin and Collagen Protein and can be left on for 12 hours to ensure the lashes get the full effect.
The shelf life of Lifted. sachets are 12 months. The expiry date is printed on the packaging.
Top Tips
Cut your shield – Sometimes the shield can be too big for the client's eye. To resolve this, simply trim the outer edge of the shield to fit.
Shield Positioning – Before applying the lash lift shield, lightly tape down the client's lashes to the eye pad. This will give a clear view of the lash line. By doing this you can position the shield as close to the lash line as possible.
Taping the lid – Apply some de-tacked tape to the eyelid and place the shield on top. Shields adhere better to tape, meaning the shield won’t move during treatment!
Lifting the Eyelids – If you have a client with loose skin on their eyelids, then this hack is for you. Using Micropore tape, simply press one end down, close to the lash line, and pull the tape up slightly. This will help lift the lid up and increase the visibility of the lash line.